Difference between revisions of "How to Create a V Rising Server Guide"
| Line 71: | Line 71: | ||
== Step 3: Port Forwarding == | == Step 3: Port Forwarding == | ||
| − | Add an incoming rule to your Windows Firewall to allow TCP/UDP port (game port) | + | Add an incoming rule to your Windows Firewall to allow TCP/UDP port (game port) 27015, (Steam query port) 27016(or whichever ports you decide to use) |
You may additionally need to add a forwarding rule to your network router. You can use [http://PortForward.com/ PortForward.com] to read how to do this. | You may additionally need to add a forwarding rule to your network router. You can use [http://PortForward.com/ PortForward.com] to read how to do this. | ||
Latest revision as of 10:20, 18 May 2022
Creating a V Rising game server is an easy process that can be done from either a dedicated server or your home computer. Alternatively, you can choose a *link coming soon* that will fit your needs.
Contents
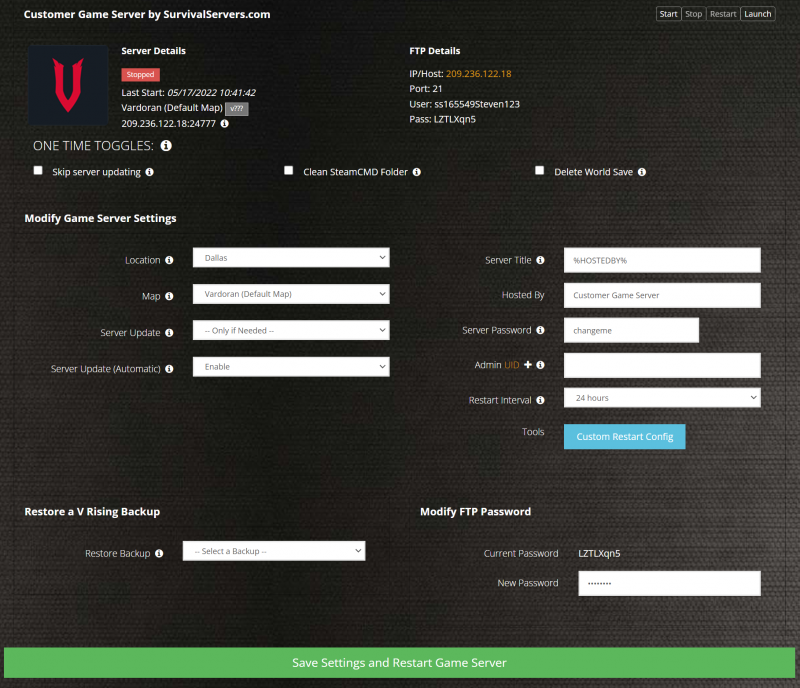
- 1 Option #1: Renting a V Rising server (see example control panel below!)
- 2 Option #2: Creating a V Rising Server From Your Home Computer or Dedicated Server
- 3 Server Requirements
- 4 Step 1: Fetching Game Server files
- 5 Step 2: Setting up a V Rising Dedicated Server
- 6 Step 3: Configuring your V Rising Server
- 7 Step 3: Port Forwarding
Option #1: Renting a V Rising server (see example control panel below!)
Option #2: Creating a V Rising Server From Your Home Computer or Dedicated Server
Server Requirements
Windows 7, 8, 8.1, Server 2016, Server 2019 & 64-Bit
Quad Core processor (requires up to 2 full cores)
Up to 16GB memory (currently uses around 2GB memory)
2GB disk space (install folder)
Step 1: Fetching Game Server files
The best method to get dedicated server game files is via the dedicated server depot on Steam via SteamCMD.
- Create a folder where you wish to store your V Rising game server hosting files
- Inside of the folder, place the newly downloading SteamCMD.exe file
- Create a batch file named SteamCMD.bat
- Place the following code in this batch file:
- @echo off
- start "" steamcmd.exe +login anonymous +force_install_dir "C:\Some\Path\Where\You\Want\Game\Server\Files\To\Go" +app_update 1829350 validate +quit
- Right-click SteamCMD.bat and Run as Administrator
- Your game server files should be completely downloaded by now
Step 2: Setting up a V Rising Dedicated Server
- Create a batch file named VRising.bat in your newly created V Rising server folder from step 1
- Place the following code in this batch file:
- start "" VRisingServer.exe -log
- Your local save files are located within this area on your computer:
%USERPROFILE%\AppData\LocalLow\Stunlock Studios\VRisingServer\Saves
- 2. However, just like with the settings, this can be overridden with the -persistentDataPath parameter.
Step 3: Configuring your V Rising Server
Now comes the fun part, setting up your V Rising game server to your liking.
To modify game server settings you can create two files
- ServerHostSettings.json
- ServerGameSettings.json
You can create these files in your VRisingServer\Settings folder
You can modify settings in here (in addition to the launch line) - these settings overwrite your launch line settings:
ServerHostSettings.json
{
- "Name" : "My V Rising Server",
- "Description" : "This is a role playing server",
- "Port" : 27015,
- "QueryPort" : 27016,
- "MaxConnectedUsers" : 10,
- "MaxConnectedAdmins" : 4,
- "SaveName" : "world1",
- "Password" : "SuperSecret",
- "ListOnMasterServer" : true,
- "AutoSaveCount" : 40,
- "AutoSaveInterval" : 120,
- "GameSettingsPreset" : "StandardPvP"
}
More info can be found here:
https://github.com/StunlockStudios/vrising-dedicated-server-instructions
Step 3: Port Forwarding
Add an incoming rule to your Windows Firewall to allow TCP/UDP port (game port) 27015, (Steam query port) 27016(or whichever ports you decide to use)
You may additionally need to add a forwarding rule to your network router. You can use PortForward.com to read how to do this.
Share your opinion