NEW! Servers for GTA V (FiveM).. Use Coupon SPOOK, take 20% off Click here to order now at SurvivalServers.com
Difference between revisions of "Soulmask Server Setup Guide"
Jump to navigation
Jump to search
Share your opinion
(No difference)
| |
Latest revision as of 18:20, 1 June 2024
Creating a Soulmask game server is an easy process that can be done from either a dedicated server or your home computer. Alternatively, you can choose a Soulmask server that will fit your needs.
Contents
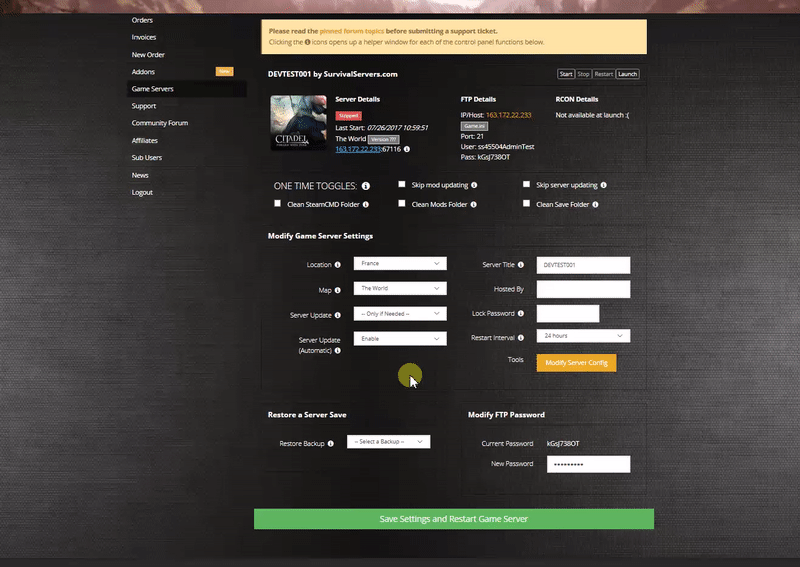
Option #1: Renting a Soulmask server (see example control panel below!)
Option #2: Creating a Soulmask Server From Your Home Computer or Dedicated Server
Server Requirements
Windows 7, 8, 8.1, 10 Server 2016, Server 2019 & 64-Bit
Dual Core processor (requires up to 2 full cores)
Up to 8GB memory (minimum 4GB)
Setting up a Soulmask Dedicated Server
Step 1: Fetching Game Server files
- Create a folder where you wish to store your Soulmask game server hosting files
- Inside of the folder, place the newly downloading SteamCMD .exe file
- Create a batch file named Soulmask.bat
- Place the following code in this batch file:
- @echo off
- start "" C:\Users\UserName\Desktop\Soulmask\steamcmd\steamcmd .exe +login anonymous anonymous +force_install_dir C:\Users\UserName\Desktop\Soulmask +app_update 3017310 +quit
- Right-click Soulmask.bat and Run as Administrator
- Your game server files should be completely downloaded by now
Step 2: Setting up the Dedicated Server
- Create a batch file named SoulmaskStart.bat in your newly created Soulmask server folder from step 1
- Place the following code in the batch file:
- call StartServer.bat -SteamServerName=\"your server name\" -MaxPlayers=50 -PSW=\"yourpassword\" -adminpsw=\"yourGMpassword\" -pve
Share your opinion