Miscreated Restore Backup: Difference between revisions
Jump to navigation
Jump to search
No edit summary |
mNo edit summary |
||
| Line 7: | Line 7: | ||
==== Restoring Backup ==== | ==== Restoring Backup ==== | ||
1. Head to your server panel and shut down the server.<br> | ::1. Head to your server panel and shut down the server.<br> | ||
2. Connect to your FTP client<br> | ::2. Connect to your FTP client<br> | ||
3. Locate your '''miscreated.db''' and rename it to '''miscreated.dbbackup'''<br> | ::3. Locate your '''miscreated.db''' and rename it to '''miscreated.dbbackup'''<br> | ||
[[File:Miscreated_backup.png|250px]] | ::::[[File:Miscreated_backup.png|250px]] | ||
4. Locate and enter the '''DatabaseBackups''' folder<br> | ::4. Locate and enter the '''DatabaseBackups''' folder<br> | ||
5. Find the restore you wish to use and drag it into an empty folder on your desktop<br> | ::5. Find the restore you wish to use and drag it into an empty folder on your desktop<br> | ||
[[File:Miscreated_1.png|450px]] | ::::[[File:Miscreated_1.png|450px]] | ||
6. Remove the _XX ( XX = the numbers on the end) from the end of the file you downloaded<br> | ::6. Remove the _XX ( XX = the numbers on the end) from the end of the file you downloaded<br> | ||
[[File:Miscreated_2.png]] | ::::[[File:Miscreated_2.png]] | ||
7. Click off of the file to save the new name.<br> | ::7. Click off of the file to save the new name.<br> | ||
[[File:Miscreated_3.png|340px]] | ::::[[File:Miscreated_3.png|340px]] | ||
8. Upload it to the root of the FTP client where the miscreated.dbbackup file is located.<br> | ::8. Upload it to the root of the FTP client where the miscreated.dbbackup file is located.<br> | ||
[[File:Miscreated_4.png|250px]] | ::::[[File:Miscreated_4.png|250px]] | ||
9. Start the server backup using the start option at the top of the panel. The restore is now complete.<br> | ::9. Start the server backup using the start option at the top of the panel. The restore is now complete.<br> | ||
* '''Note: using the green button at the bottom may overwrite your cfg files.''' | ::* '''Note: using the green button at the bottom may overwrite your cfg files.''' | ||
Revision as of 11:33, 17 May 2021
Miscreated Backup Restore
The backup feature through the control panel is a separate service that we offer and does not currently cover miscreated. If you want / need to restore the server, such as your primary one, you can do this via FTP.
For instructions on how to use FTP, please refer to the FTP Access page.
Restoring Backup
- 1. Head to your server panel and shut down the server.
- 2. Connect to your FTP client
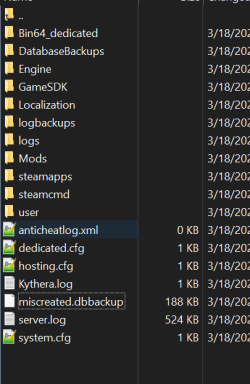
- 3. Locate your miscreated.db and rename it to miscreated.dbbackup
- 1. Head to your server panel and shut down the server.
- 4. Locate and enter the DatabaseBackups folder
- 5. Find the restore you wish to use and drag it into an empty folder on your desktop
- 4. Locate and enter the DatabaseBackups folder
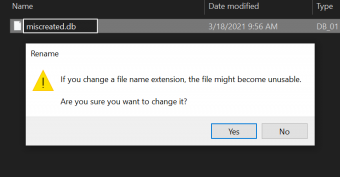
- 6. Remove the _XX ( XX = the numbers on the end) from the end of the file you downloaded
- 6. Remove the _XX ( XX = the numbers on the end) from the end of the file you downloaded
- 7. Click off of the file to save the new name.
- 7. Click off of the file to save the new name.
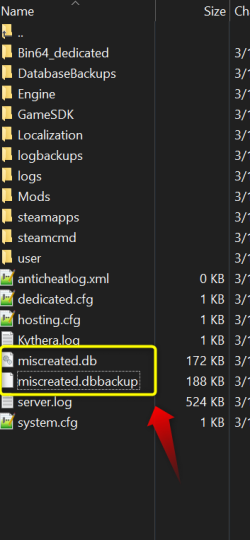
- 8. Upload it to the root of the FTP client where the miscreated.dbbackup file is located.
- 8. Upload it to the root of the FTP client where the miscreated.dbbackup file is located.
- 9. Start the server backup using the start option at the top of the panel. The restore is now complete.
- Note: using the green button at the bottom may overwrite your cfg files.
- 9. Start the server backup using the start option at the top of the panel. The restore is now complete.


