How to Create an Atlas Dedicated Server Guide
Creating a Atlas game server is an easy process that can be done from either a dedicated server or your home computer.
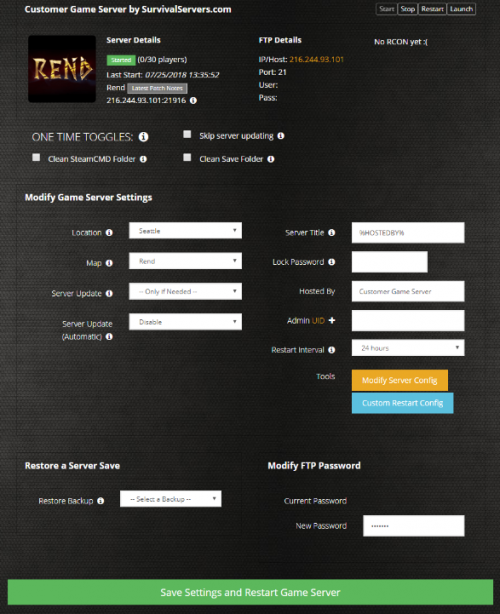
Option #1: Renting a Atlas server (see example control panel below!)
Option #2: Creating a Atlas Server From Your Home Computer or Dedicated Server
Server Requirements
Windows 7, 8, 8.1, Server 2008, Server 2012 & 64-Bit
Quad Core processor (requires up to 2 full cores)
Up to 16GB memory (currently uses around 6GB memory minimum and up to 15GB of memory for a full server)
25GB disk space (install folder)
Visual C++ Redistributable for Visual Studio 2015
Step 1: Fetching Game Server files from SteamCMD
The best method to get dedicated server game files is via SteamCMD.
- Create a folder where you wish to store your Atlas game server hosting files in
- Inside of the folder, create a folder called SteamCMD and place the newly downloading SteamCMD.exe file within it
- Create a batch file named SteamCMD.bat within the SteamCMD folder
- Place the following code in this batch file:
- @echo off
- start "" steamcmd.exe +login username password +force_install_dir "C:\Some\Path\Where\You\Want\Game\Server\Files\To\Go" +app_update 123456 validate +quit
- Change the "Username" and "Password" with your steam login info
- Change the Path of the C:\ drive to the location of your Atlas server folder you created earlier
- Right-click SteamCMD.bat and Run as Administrator
- Your game server files should start downloading now
(alternate method): Locating Game Server Files on Hard Drive
You can host Atlas directly from the game itself. If you want to change any settings, locate your common folder:
- Right-click Atlas from Steam, select Properties
- Click Local Files tab
- Click Browse Local Files button
- Note: Make sure to have steamcmd in with the files if you are using this method, as it will allow for updating.
Step 2: Setting up a Atlas Dedicated Server
- Create a batch file named AtlasServer.bat or Launch.bat in your newly created Atlas server folder from step 1
- Place the following code in this batch file:
- start "" /NORMAL "C:\atlasserver\AtlasServer.exe" -Port=27015 -log
- Make sure to set your Port and BeaconPort to different ports not in use.
- Once this is completed you should have a list of server files along with the .bat file you created in the server folder.
- This .bat file will let you launch the server
Step 3: Port Forwarding
Add an incoming rule to your Windows Firewall to allow UDP port 27015 as well as 27016, and 7777 (or whichever port you decide to use).
You may additionally need to add a forwarding rule to your network router. You can use PortForward.com to read how to do this.
Configuring your Atlas Game Server!
Now comes the fun part, setting up your Atlas game server to your liking.
We've setup a dedicated Wiki page for this:
Atlas Server Configuration Parameters and Variables
Locating and Joining your server
Method 1: Using Steam Favorites
- First make sure your server is running by running the AtlasServer.bat or Luanch.bat file as admin (If the CMD window is already up for it then you are fine)
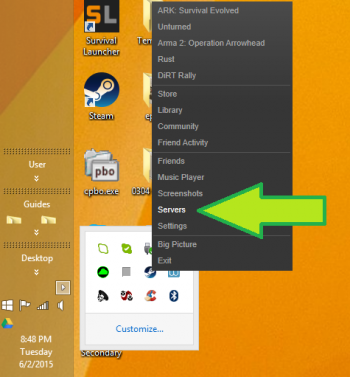
- Head into steam and click on the view tab at the top left
- From there select servers and a new panel will show up
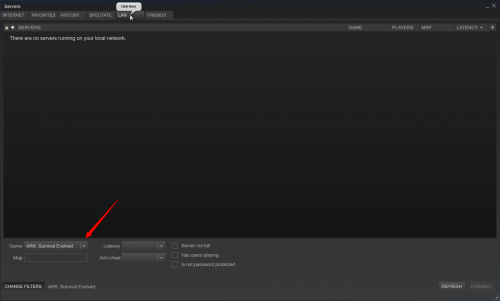
- Hit the Lan tab at the top and the filter button at the bottom
- Set the filter to Atlas
- If your server shows up there then you know it is running and ready to roll
Method 2: Use a Third Party Site
You can alternatively use a site like Atlas Servers to find a server in the list.
How to Join Your Server (SurvivalServers.com Customers)
Method 1: Finding your server hosted by survivalservers.com
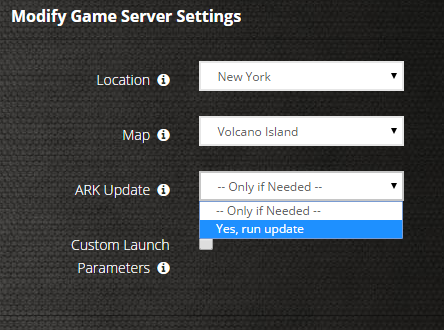
STEP 1: Update your server to the newest Atlas version using the update/validate option on the panel, then click the green update button at the bottom. * If you are not a Survival Servers customer ask your game server host about this.
- Once you are sure the server is updated and shows started on the panel. Head into the game
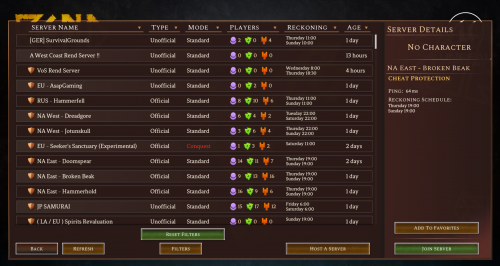
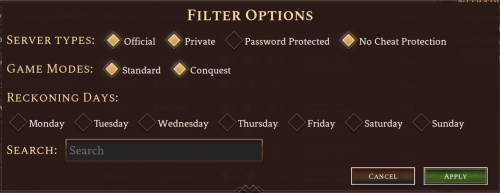
- In the game click Find Server and then look for your server in the Unofficial Server listings (Note if you have a password set on your server. Make sure to check the "Show Password Protected" box in the filters area)
- You can also use the Filter at the bottom of the list to find your server faster.
Location of World Save Data
The location of the saved folder will very depending how you are hosting it. If you are hosting with survivalservers.com then your save data location will look like the following.
\ShooterGame\Saved\
If you are hosting a Atlas server locally then your directory will probably look similar only it will not have the numbers on the end.
\ShooterGame\Saved\
If you are with another hosting company then you will want to contact them for information on where the save data is located.
Running Admin Commands
In order to use admin commands. You will want to make sure your steam64 bit ID is locked into the GameUserSettings.ini file.
(Check the link out below or look above to where the GameUserSettings.ini is located)
You can now run admin commands in game. For a full list of commands you view the Atlas Admin Server Commands
Tools
- Coming soon.
