Atlas Server Grid Editor
Contents
The Basics
To get started with making/editing Atlas Server Grids (the map hosted on servers) you will need the Server Grid Editor that was created by Grapeshot Games and you will need your servers ServerGrid.json file.
To get this file do the following:
- Access your servers FTP directory, information on how to use FTP can be found here
- Download/save the ServerGrid.json file to your computer!
Once you have downloaded the Server Grid Editor and obtained your ServerGrid.json file, there are a few terms that you should be familiar with going forward!
- SGE - Server Grid Editor
- ServerGrid.json - This is the file that is generated by the SGE that contains all map cell data for your server cluster. Also referred to as the Server Grid
- Cell - Each Cell is a 1x1 section of a Server Grid. Each cell is one actual server
How to add more Cells to a Server Grid
Now that you are acquainted with the SGE and some common terms, lets dive in with learning how to add more Cells to your server grid! There is no simple process to "merge" premade Server Grids together. If you decide to add more cells to your server grid you will need to manually create these cells and then populate them with islands!
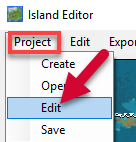
Once you have opened up the file click on "Project" in the top left Corner, from that drop down click on "Edit"
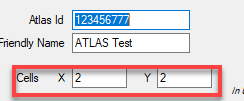
That will open up a new window, and near the top you should see something like in the below image! To get your desired map size change the X and Y values! After doing that click on the "Edit" button near the bottom!
Doing this will generate new cells on your current server grid. From here you can set the cells climate as well as add various different islands! Make sure you "Control+click (ctrl+Click)" on each grid and set the IP and Port information, you can just follow the other cells in the grid as a guide, as once its uploaded our system will populate it with the correct information!
Once you are done making all of you edits, click on "Export" at the top and select "All" from then drop down menu! This will export the ServerGrid.json and all Map Tiles to the install location of your Server Grid Editor!
After that you can upload the ServerGrid.json file and zip up the generated ServerGrid folder and upload it to your servers via our control panel or manually via FTP!
How to Change the Climate of a Server Cell
After you have added the new cell to your server grid, you will want to select the climate for those cells!
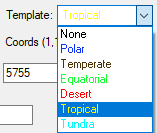
To do this, open the ServerGrid.json with the SGE. Then you will "control-click (crtl+mouse button)" on the cell you want to adjust At the top you will see a dropdown menu for "Template" from here you can select the climate for that cell!
How to Add Islands to a Server Grid
Now once you have added more cells to your Server Grid, you will very likely want to add new islands so there is something more then just barren ocean to sail around in. In the next part, we will go over how you add islands to these freshly created cells!
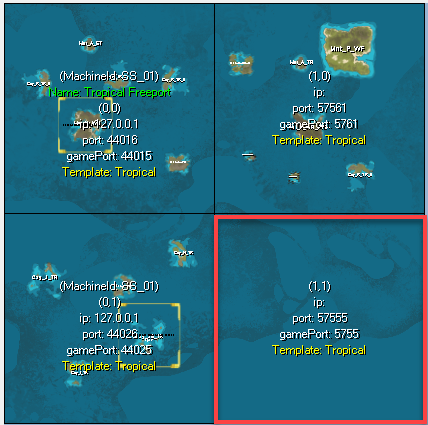
For this part, we will being using 4 grids A1,A2,B1,B2 and will change just B2 and leave all the others untouched.
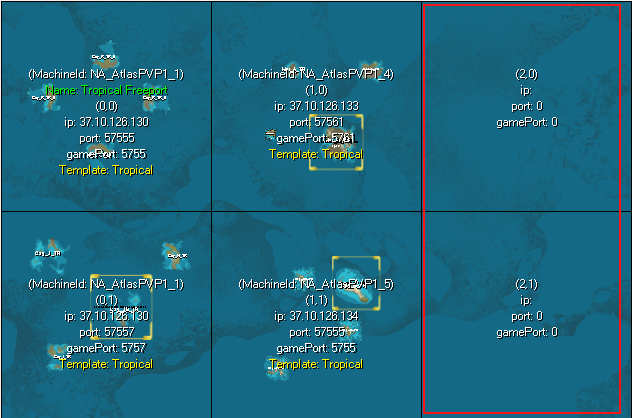
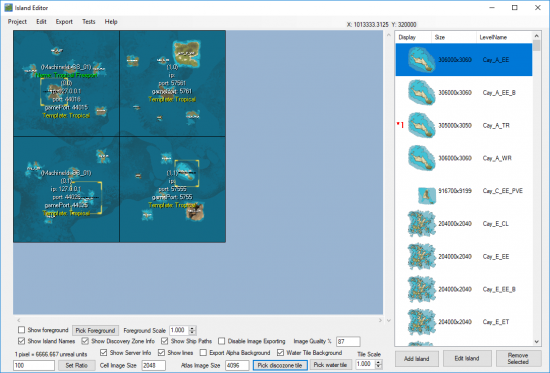
Once you have opened up the file, you will see something similar to the below image (it will vary depending on your map size, for the purpose of this guide the below is a 2x2 grid)
If you wanted to change just the islands in the map region of B2 (1,1) you would want to first clear out the grid of all current islands. To do this simply click on each island in the grid and press the delete key on the keyboard while hovering the mouse cursor of the islands in questions!
Now to add new islands to then grid that was just cleared out, you will want to use the list of islands on the right side of the Server Grid Editor. You can scroll through this list and simply drag and drop the islands onto the server grid!
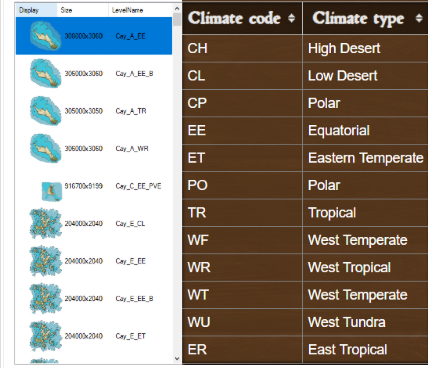
- Islands in the list are follow this naming convention: IslandType_IslandShape_Climate_Variant
- The 2nd image below shows your the climate code so for example, the first island in the below list is Cay_A_EE, this island has an Equatorial climate!
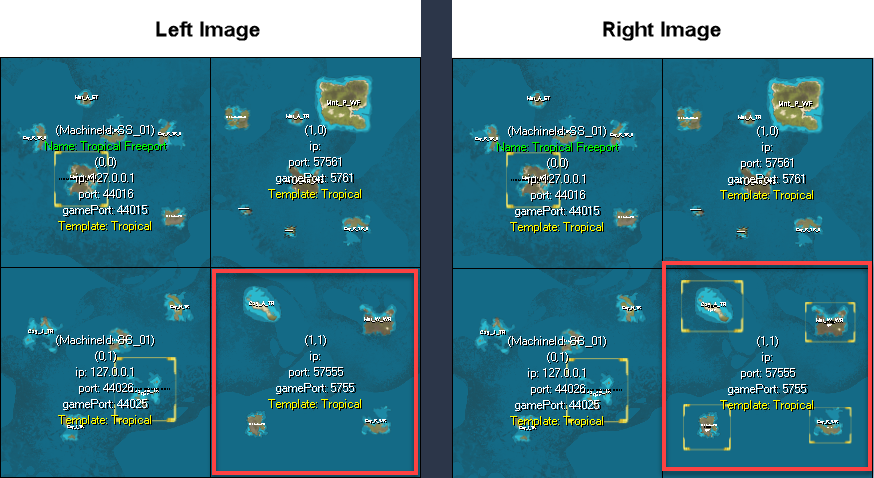
The below image on the left has the newly added islands, but the discovery zones still need to be added. To add discovery zones all you need to do is "shift+left click" near the island then drag your mouse cursor over what you want to be included in the discovery area. Simply do this for all islands you want to award discovery points for players landing on. (see below image on the right)
Once you are done making all of you edits, click on "Export' at the top and select "All" from then drop down menu! This will export the ServerGrid.json and all Map Tiles to the install location of your Server Grid Editor!
After that you can upload the ServerGrid.json file and zip up the generated ServerGrid folder and upload it to your servers via our control panel or manually via FTP!
It is very important to note that if you do change any island data for one of your grids in this case grid B2, you need to perform a "Clean Save Folder" option on the server that currently runs that grid in your Atlas cluster
Share your opinion

