Database Backup and Restore: Difference between revisions
Jump to navigation
Jump to search
| (2 intermediate revisions by the same user not shown) | |||
| Line 29: | Line 29: | ||
Photo #1:<br> | Photo #1:<br> | ||
[[File:PhpRedisAdminupdate.png] | [[File:PhpRedisAdminupdate.png|850px]] | ||
<br><br> | <br><br> | ||
Photo #2:<br> | Photo #2:<br> | ||
[[File:PhpRedisAdminupdate2.png]] | [[File:PhpRedisAdminupdate2.png|600px]] | ||
Latest revision as of 16:27, 10 April 2018
DB Backup and Restore Tool
This tool creates database backups of your server every 30 minutes of EVERY day for 3 days straight, and discards each backup individually at the end of 72 hour period.
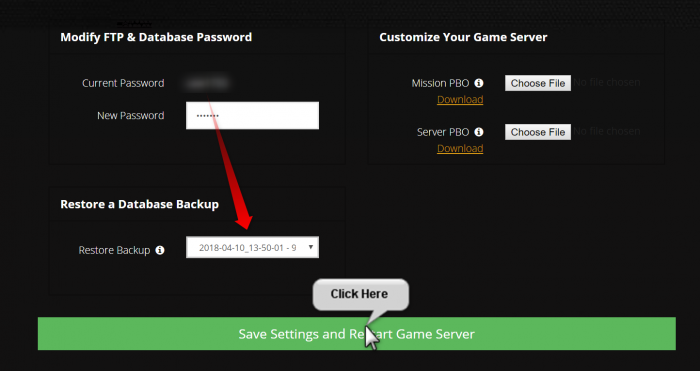
    Step 1: Open your Game server control panel, scroll to the bottom left and choose the restoration point from the drop down list.
            See the photo below for help.
    Step 2: Press the big green button to restore a database. IMPORTANT: This will wipe your server.cfg to a default server.cfg, please
            make a backup if you made any changes to that file
Export and Import Databases with PhpRedisAdmin
This is a web browser database tool, that allows you to export and import your database.
This can be used as an alternative to our DB restore tool mentioned above.
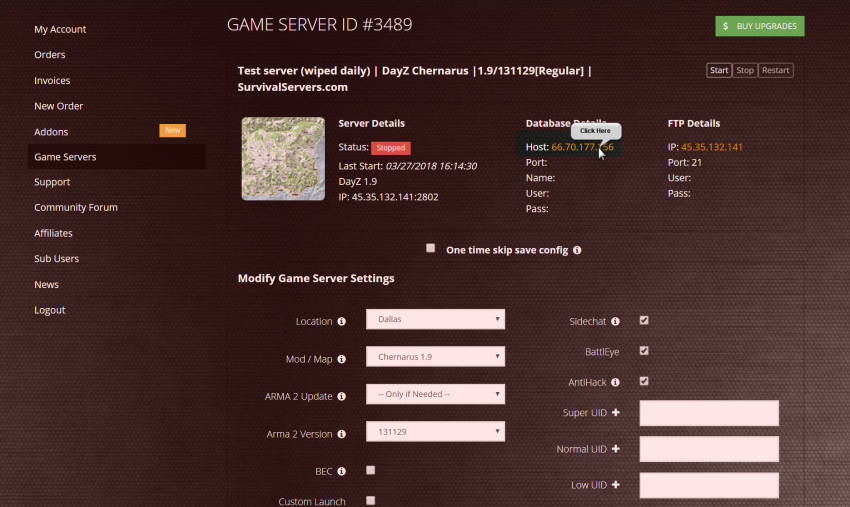
    Step 1: Open your Game server control panel, and at the top/middle, click on the host IP address underneath where it says "Redis DB Details".
            This will take you to a new page in the web browser.  See photo 1 below for help.
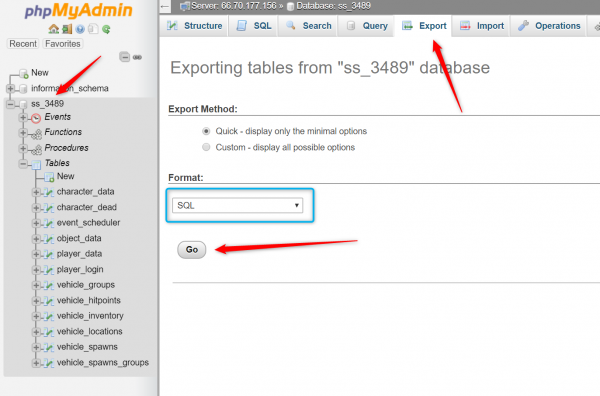
Step 2: Click the small silver export icon in the upper left corner. See photo 2 below for help.
    Step 3: Click Export on the right, and then copy / paste all of the data into Notepad++ or Notepad. IMPORTANT: If you save a copy of the
            exported data, it will help you stay organized if you make a new folder on your computer that is labelled with the DATE of the backup,
            this way you can easily restore data from a certain time or day.
Step 4: Click the small silver Import icon in the upper left corner. Paste the data to re-import it and click the Import button below the text box.
PhpMyAdmin
COMING SOON
How to save copies of your modified files
COMING SOON


